EXPORTING A DIRECTORY TREE OF A FOLDER IN WINDOWS
- Get link
- X
- Other Apps
From Exporting A Directory Tree of A Folder in Windows - FSV Blog (foldersecurityviewer.com)
EXPORTING A DIRECTORY TREE OF A FOLDER IN WINDOWS
/0 Comments/by CarstenWhen working on your computer, a time comes when you need to explore an entire directory tree to a folder. Sometimes, all you want is a list of all your files and folders contained in a certain folder as a text document or an Excel spreadsheet.
You may, a couple of times, find yourself in a situation where you need to come up with a summarized document of all your files stored in a specific folder. This may not be a walk in the park for many Windows users. But no matter how hard it may sound, it can easily be done.
Most articles online won’t give you a step by step procedure, but here, this useful information will get you to exporting your directory to a folder without even breaking a sweat, no matter what version of Windows you are using.
STEPS
1. Navigate to the folder and open cmd
Using the Windows Explorer, go to the folder that you need exported. In our case, this will be F:\Meg.

Now open the folder.

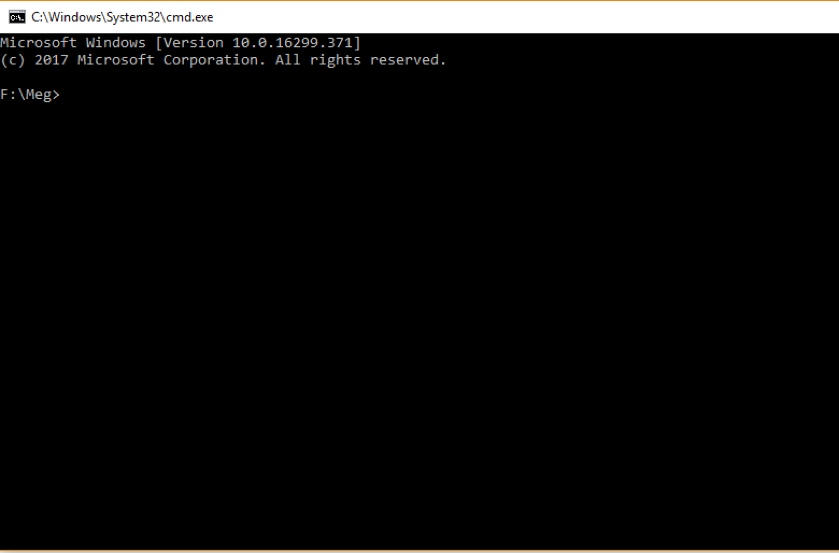
While here, key in cmd on the address bar which appears on the Windows File Explorer, then press Enter. This will open the Command Prompt right not he folder which you are interested in.
REPORT NTFS PERMISSIONS ON WINDOWS FOLDERS IN UNDER 60 SECONDS!
NEW VERSION AVAILABLE - NEW MODERN UI
Discover the security leaks in your Windows fileserver environment now!

Once you are done, you will notice a Command Prompt that points to the specific folder. For instance, as you can see on the photo above that our Command Prompt is open on the F:\Meg folder.
Launching a Command Prompt with administrative rights is vital when exporting a directory tree of a folder which has files and sub-folders. There are loads of materials online which will guide you through opening a Command Prompt as an administrator.
2. Run the “Tree” command
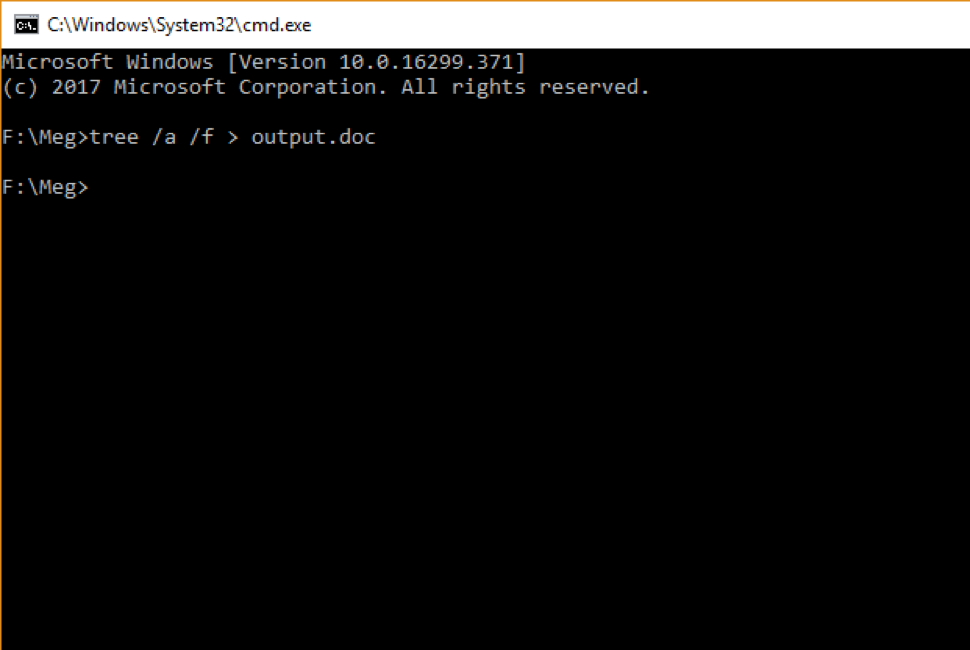
Running the ‘tree’ command is the most vital step while exporting a directory tree of a folder. This will let you get an orderly list of files and folders contained in the said folder. On the Command Prompt, key in tree /a /f > output.doc.

In our case, the “output.doc” is the document file where you will have your whole directory tree saved. Here, you can rename it as you wish, and also specify any file type, provided it is in a text format.
We are using a Microsoft Word document file but any other text file would work just the same. You may also decide to export the directory tree to a ‘text’ format which can edited using Notepad (.txt).
Double check to ensure that the command on the Command Prompt is correctly written before you press Enter. Sometimes, it may take longer for the command to run, depending on the number of files and folders that are stored in the parent folder. Just be patient and wait for the command to finish running.
3. Text file with the Directory Tree
Up to this juncture, you are done with the Command Prompt and you can safely close it. Now, go to your Windows File Explorer and open the folder where you wanted the directory tree exported.
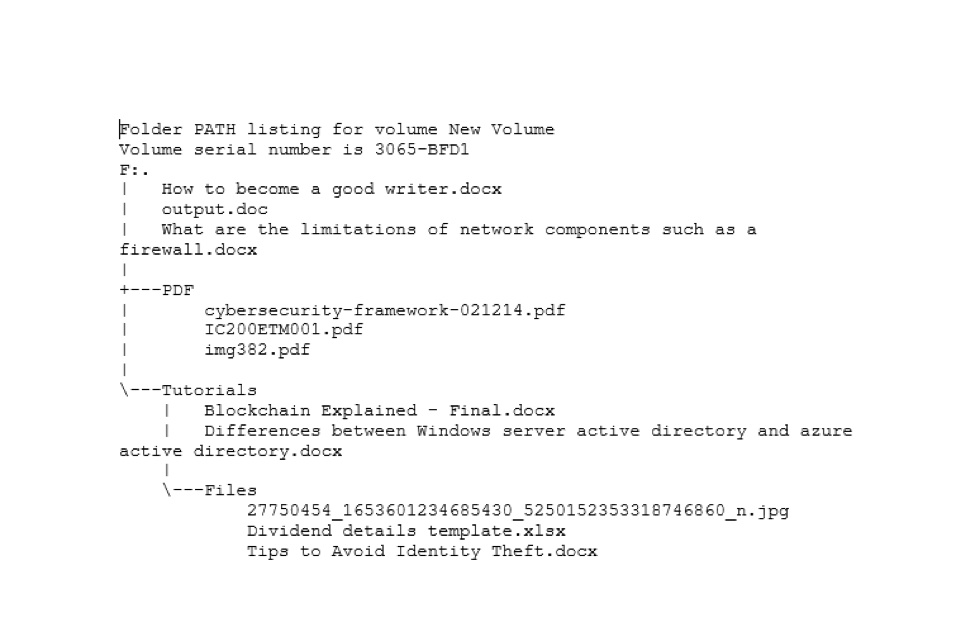
When you are running the tree command in Step 2, “output.doc” was the document file where the whole directory tree was saved. Now inside that folder, there will be a text file named “output.doc” which contains the directory tree.

When you open the output file, you will notice that the whole directory tree is listed inside.

Exporting a directory structure to a text document is not that hard when using Windows. Always use the Command Prompt and ensure your commands are typed in properly.
We hope these few steps will aid you next time you need to export a directory tree of a folder in a text document.
- Get link
- X
- Other Apps

Comments
Post a Comment